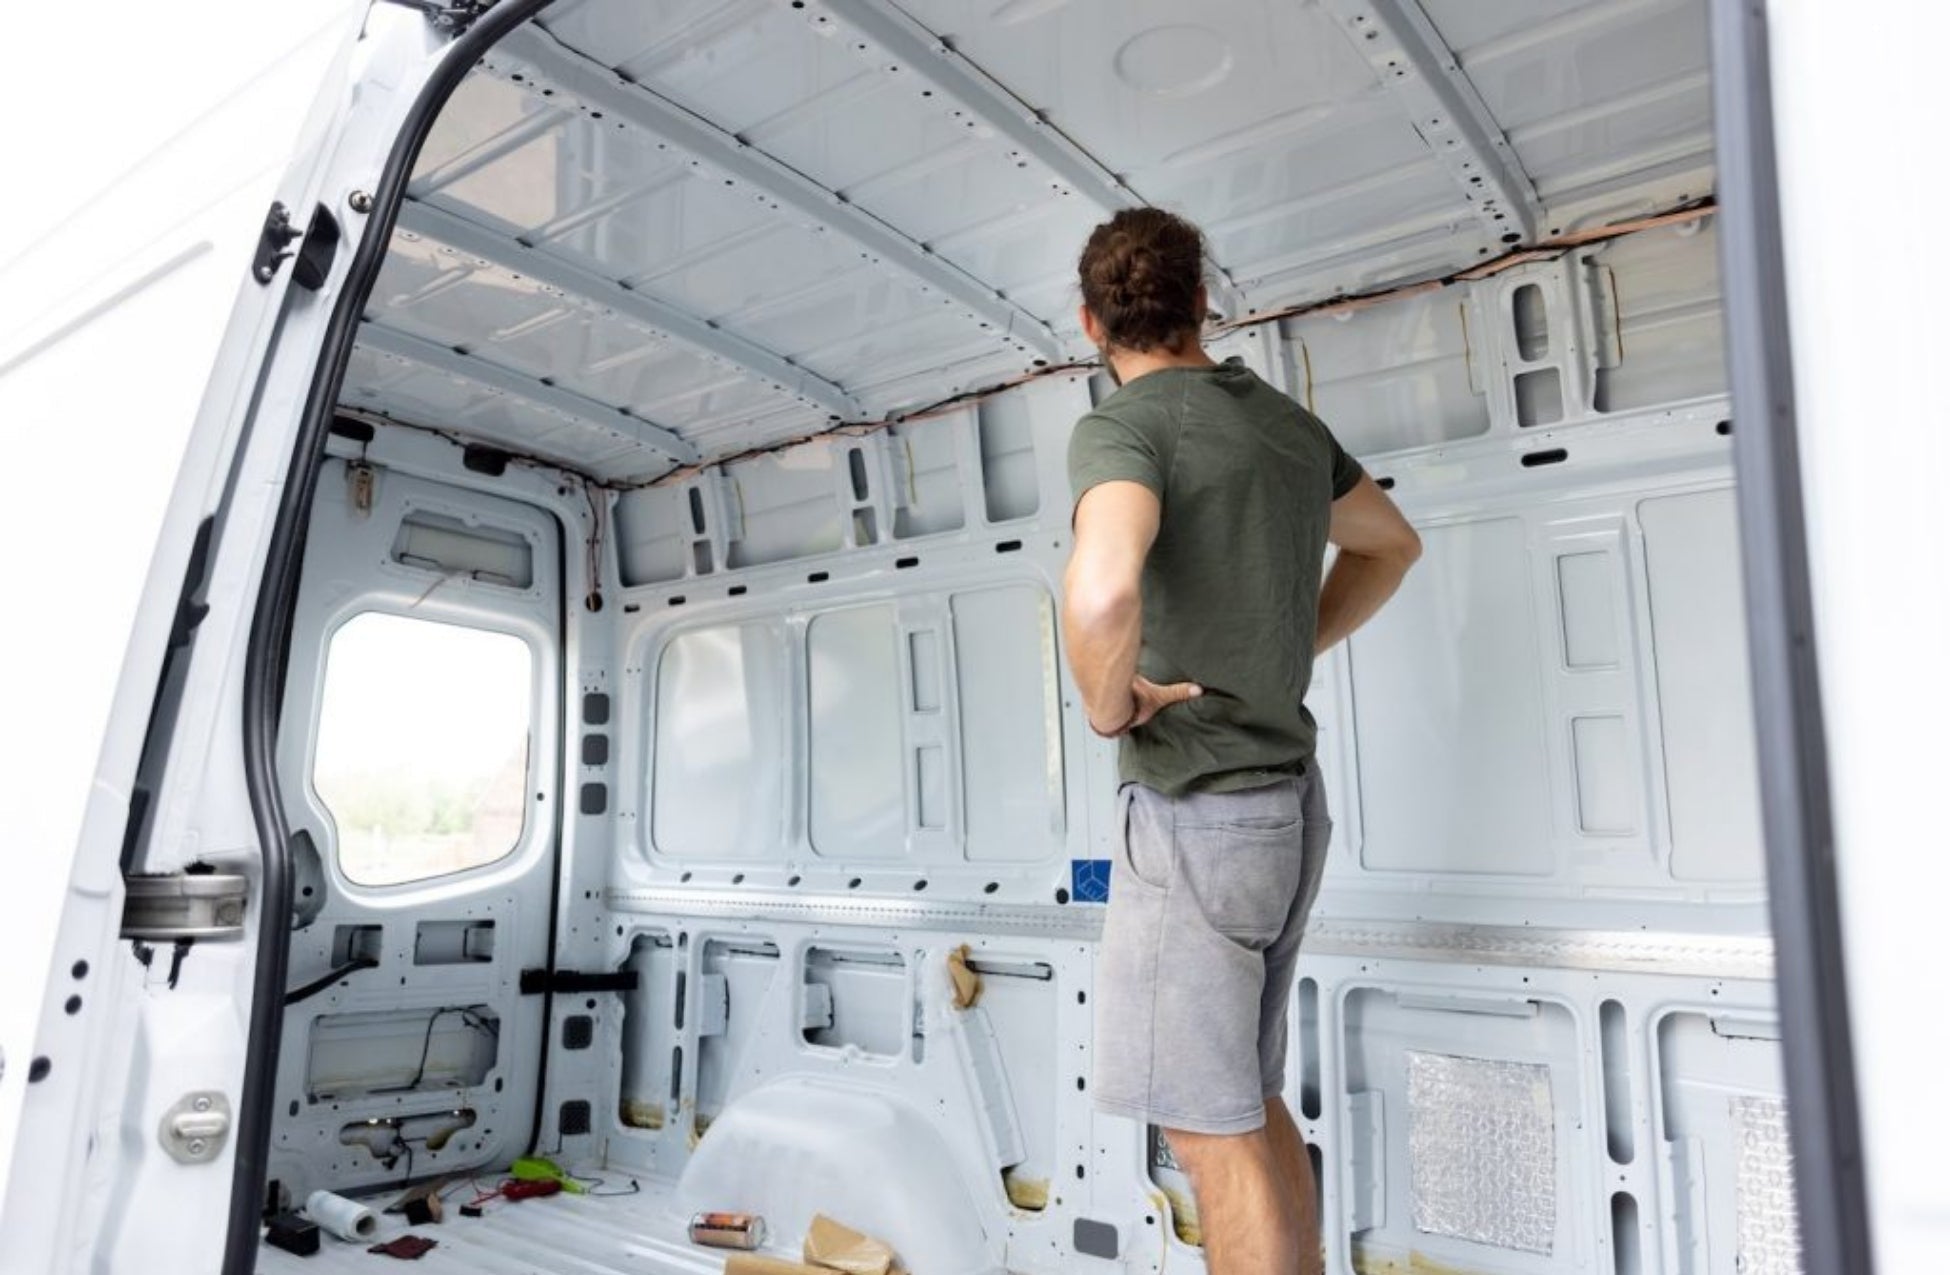
Converting a van or panel van is much more than a technical project: it’s the start of a new way of living, traveling, and organizing. Whether you’re heading out for a weekend, a tour of Europe, or a full-time nomadic life, every equipment choice matters.
At Vanlife Store, we support hundreds of converters every year - beginners and experienced alike. This complete guide follows the real steps of a successful conversion, from the floor to the finishes, with products suited to every need.
💡 Need personalized advice? Our technical team is available for free via chat or phone. We are at your disposal
- 1. Step 1: Sanitizing: preparing a healthy base
- 2. Step 2: Creating openings – Windows
- 3. Step 3: Creating openings – Rooflights
- 4. Step 4: Pre-wiring and electrical installation
- 5. Step 5: Insulation
- 6. Step 6: Heating: stay warm all year round
- 7. Step 7: The kitchen: fridges, pump and sink at the heart of your van
- 8. Step 8: Installing the toilets & bathroom
- Conclusion: the list of elements to outfit your van step by step
- 9. FAQ — Your questions about van conversion
1. Step 1: Sanitizing: preparing a healthy base
Before any conversion, it is essential to start with a clean and healthy base.
👉 Why is this essential?
- Eliminating moisture and rust
- Ensuring good material durability over time
- Preventing bad odors and mold
This step generally includes:
- Complete cleaning
- Anti-corrosion treatment
- Checking for leaks
💡 A well-prepared vehicle means a conversion that lasts over time.
For this step, we recommend our SIKAFLEX and our treatment products available in our window blind and mosquito net packs. One of our experts can also guide you for free on the products suited to your vehicle: contact us via chat.
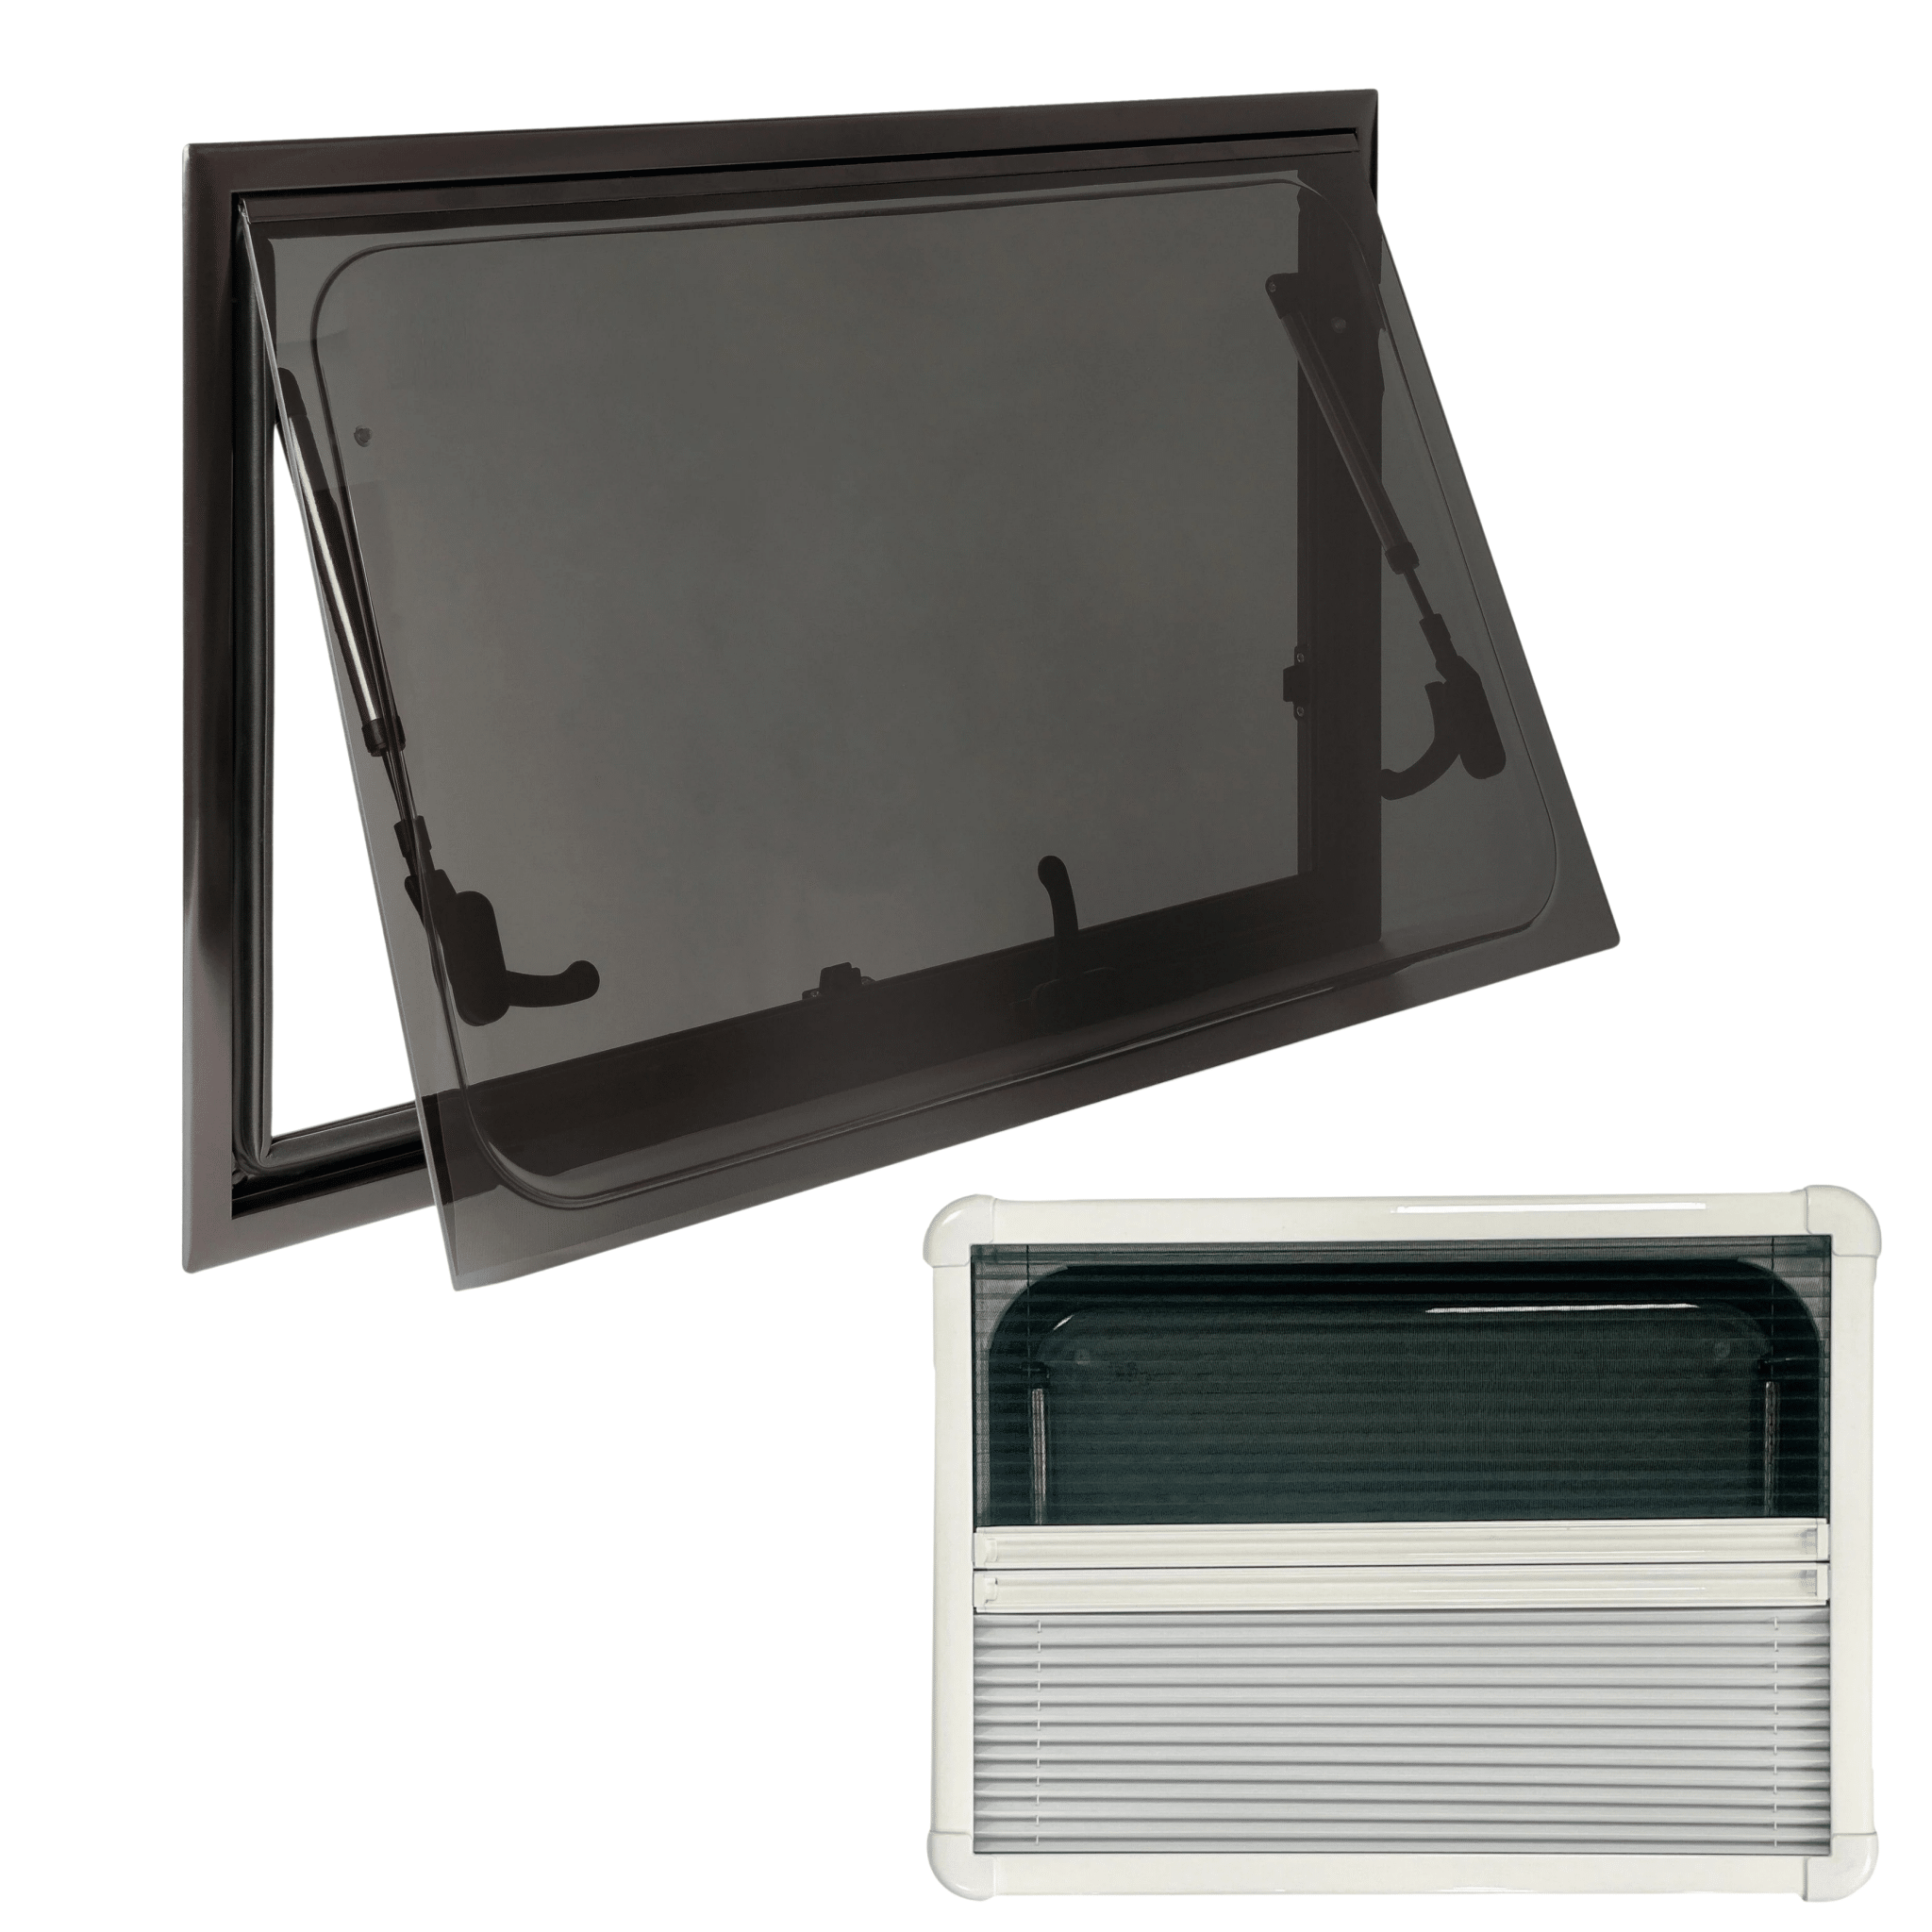
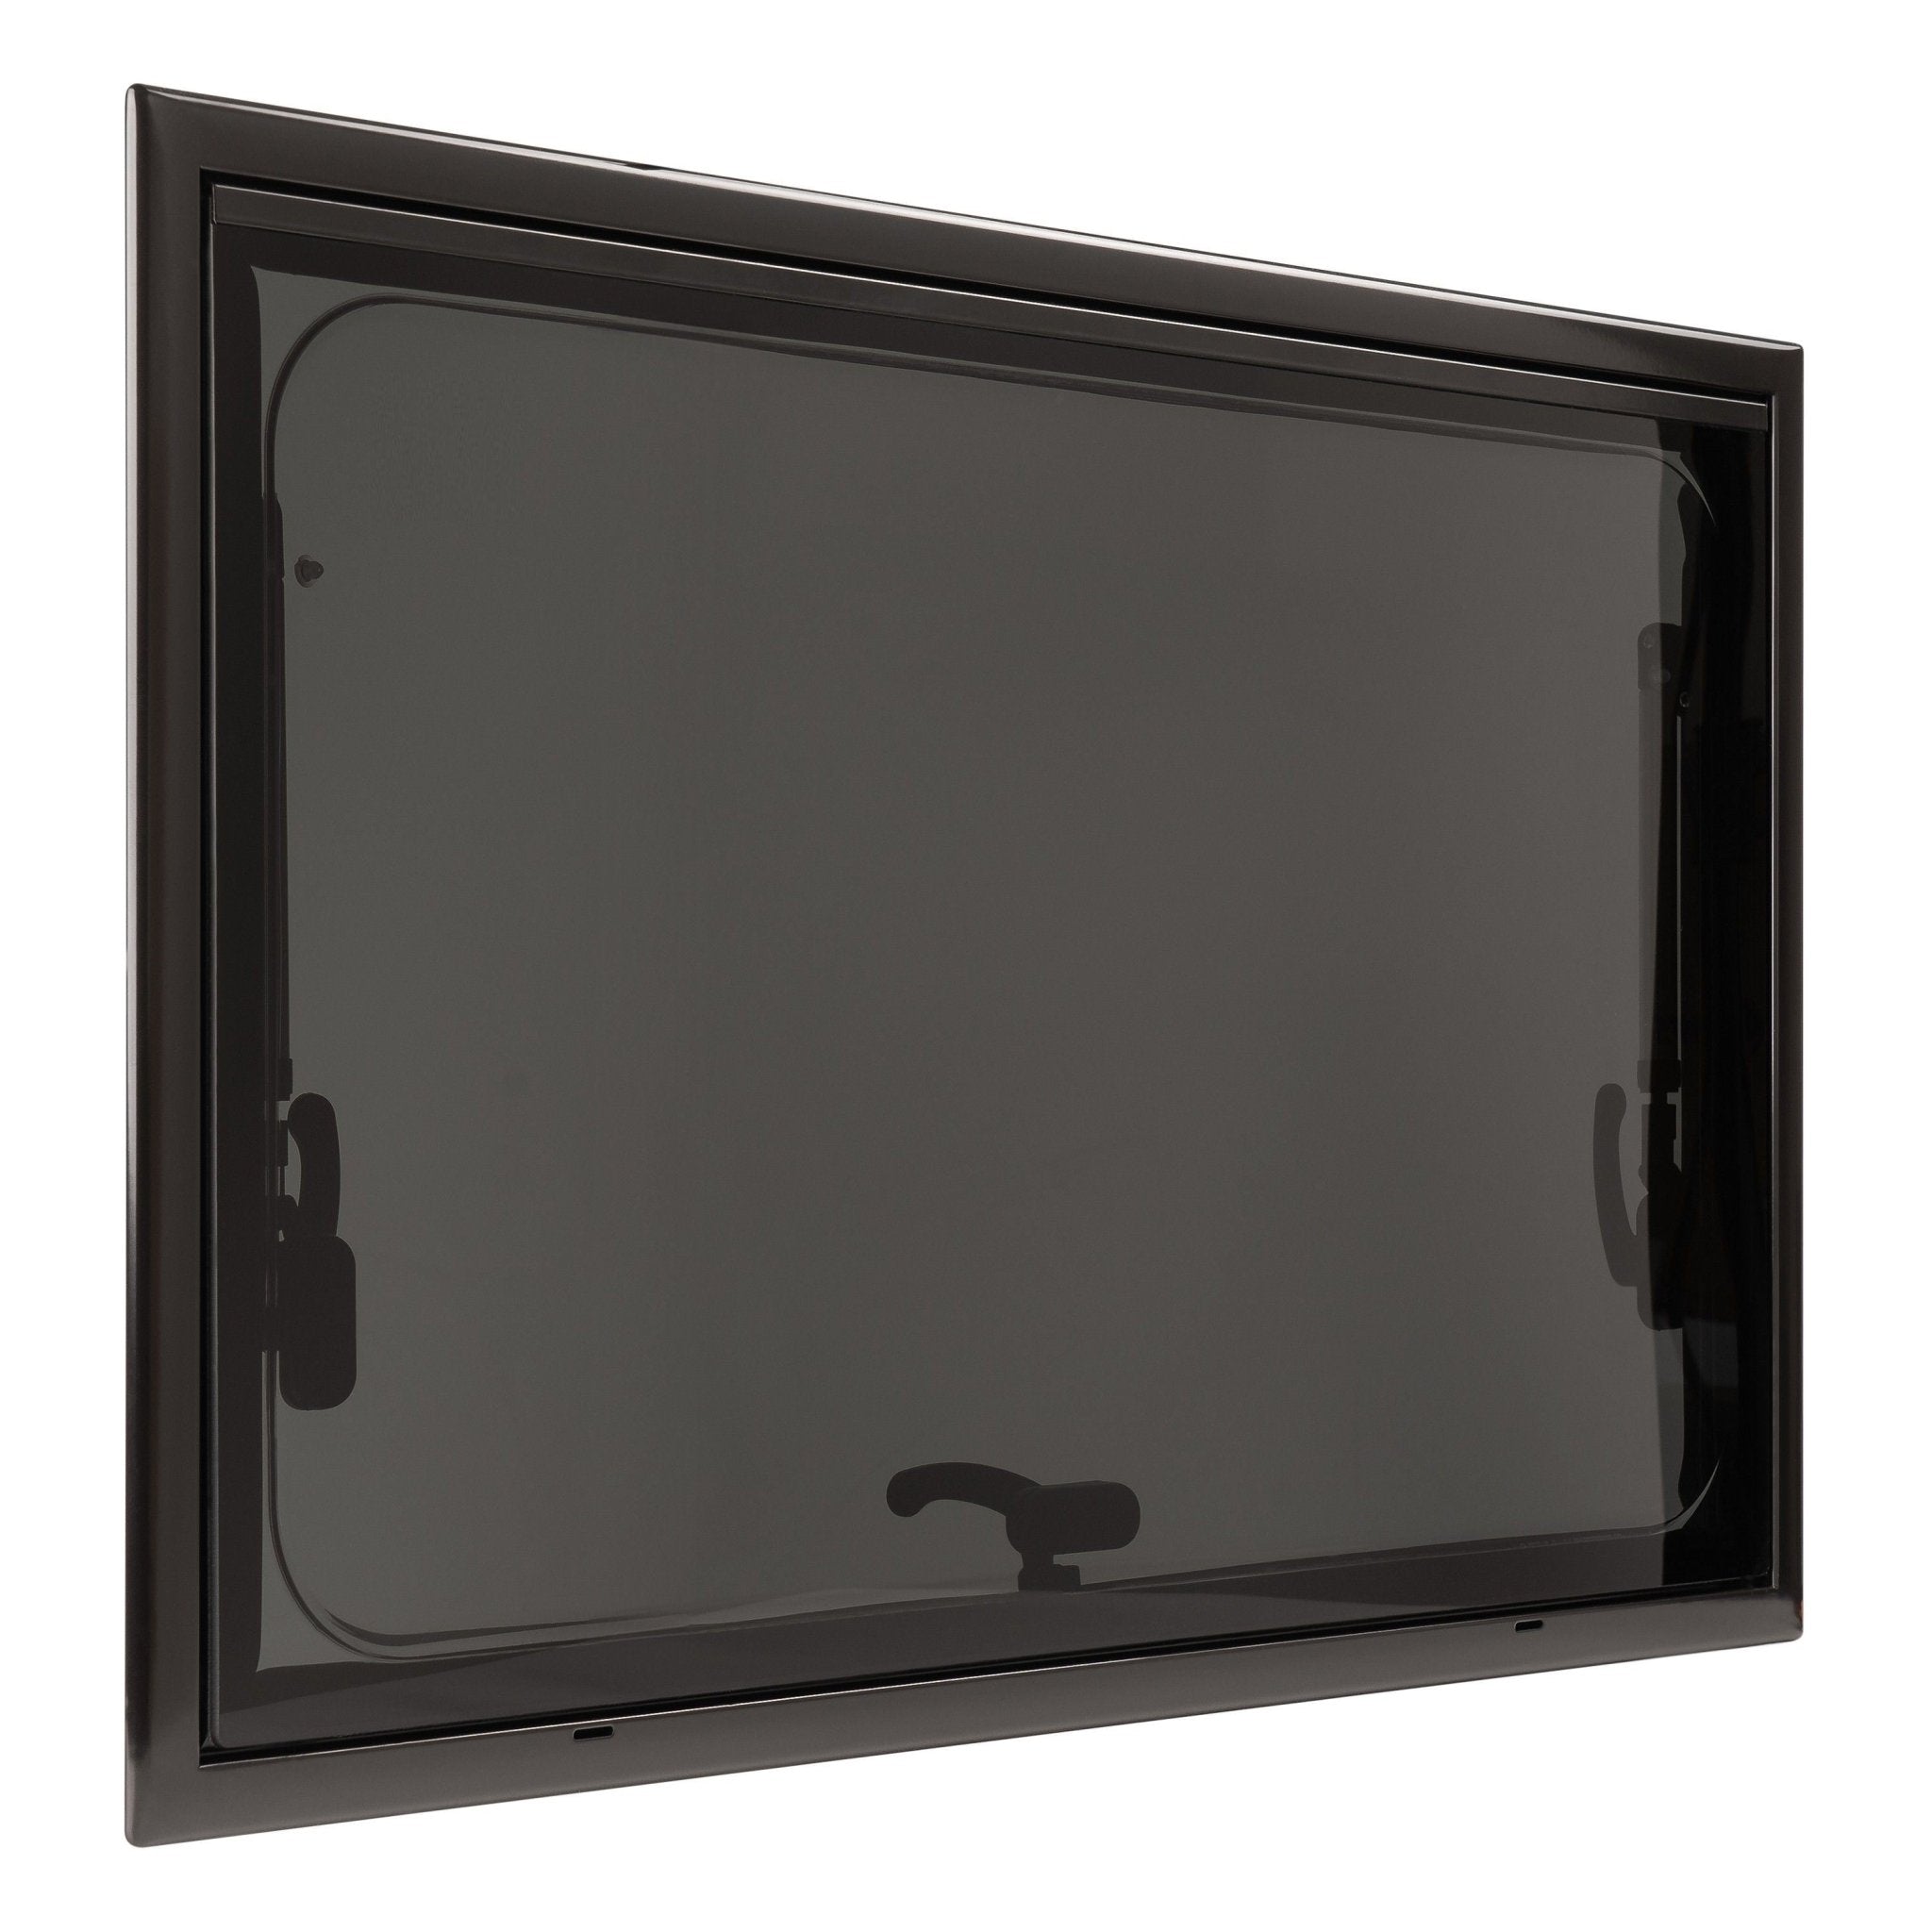
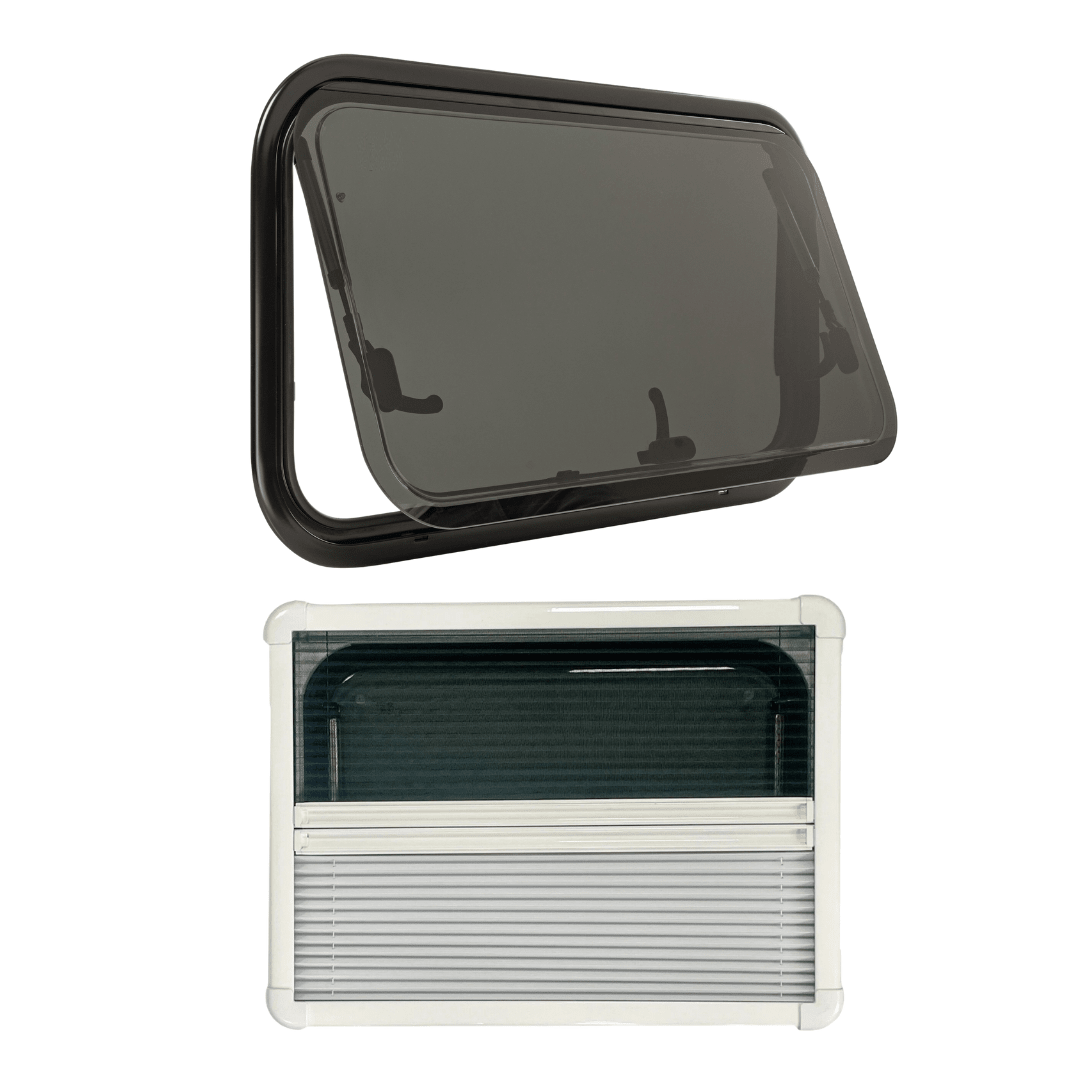
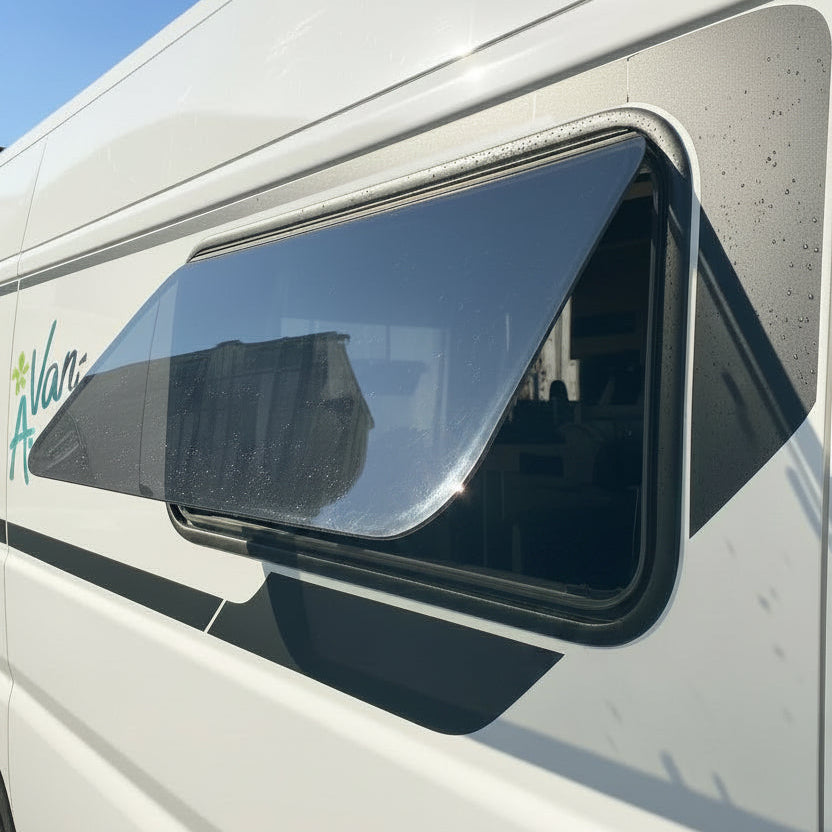
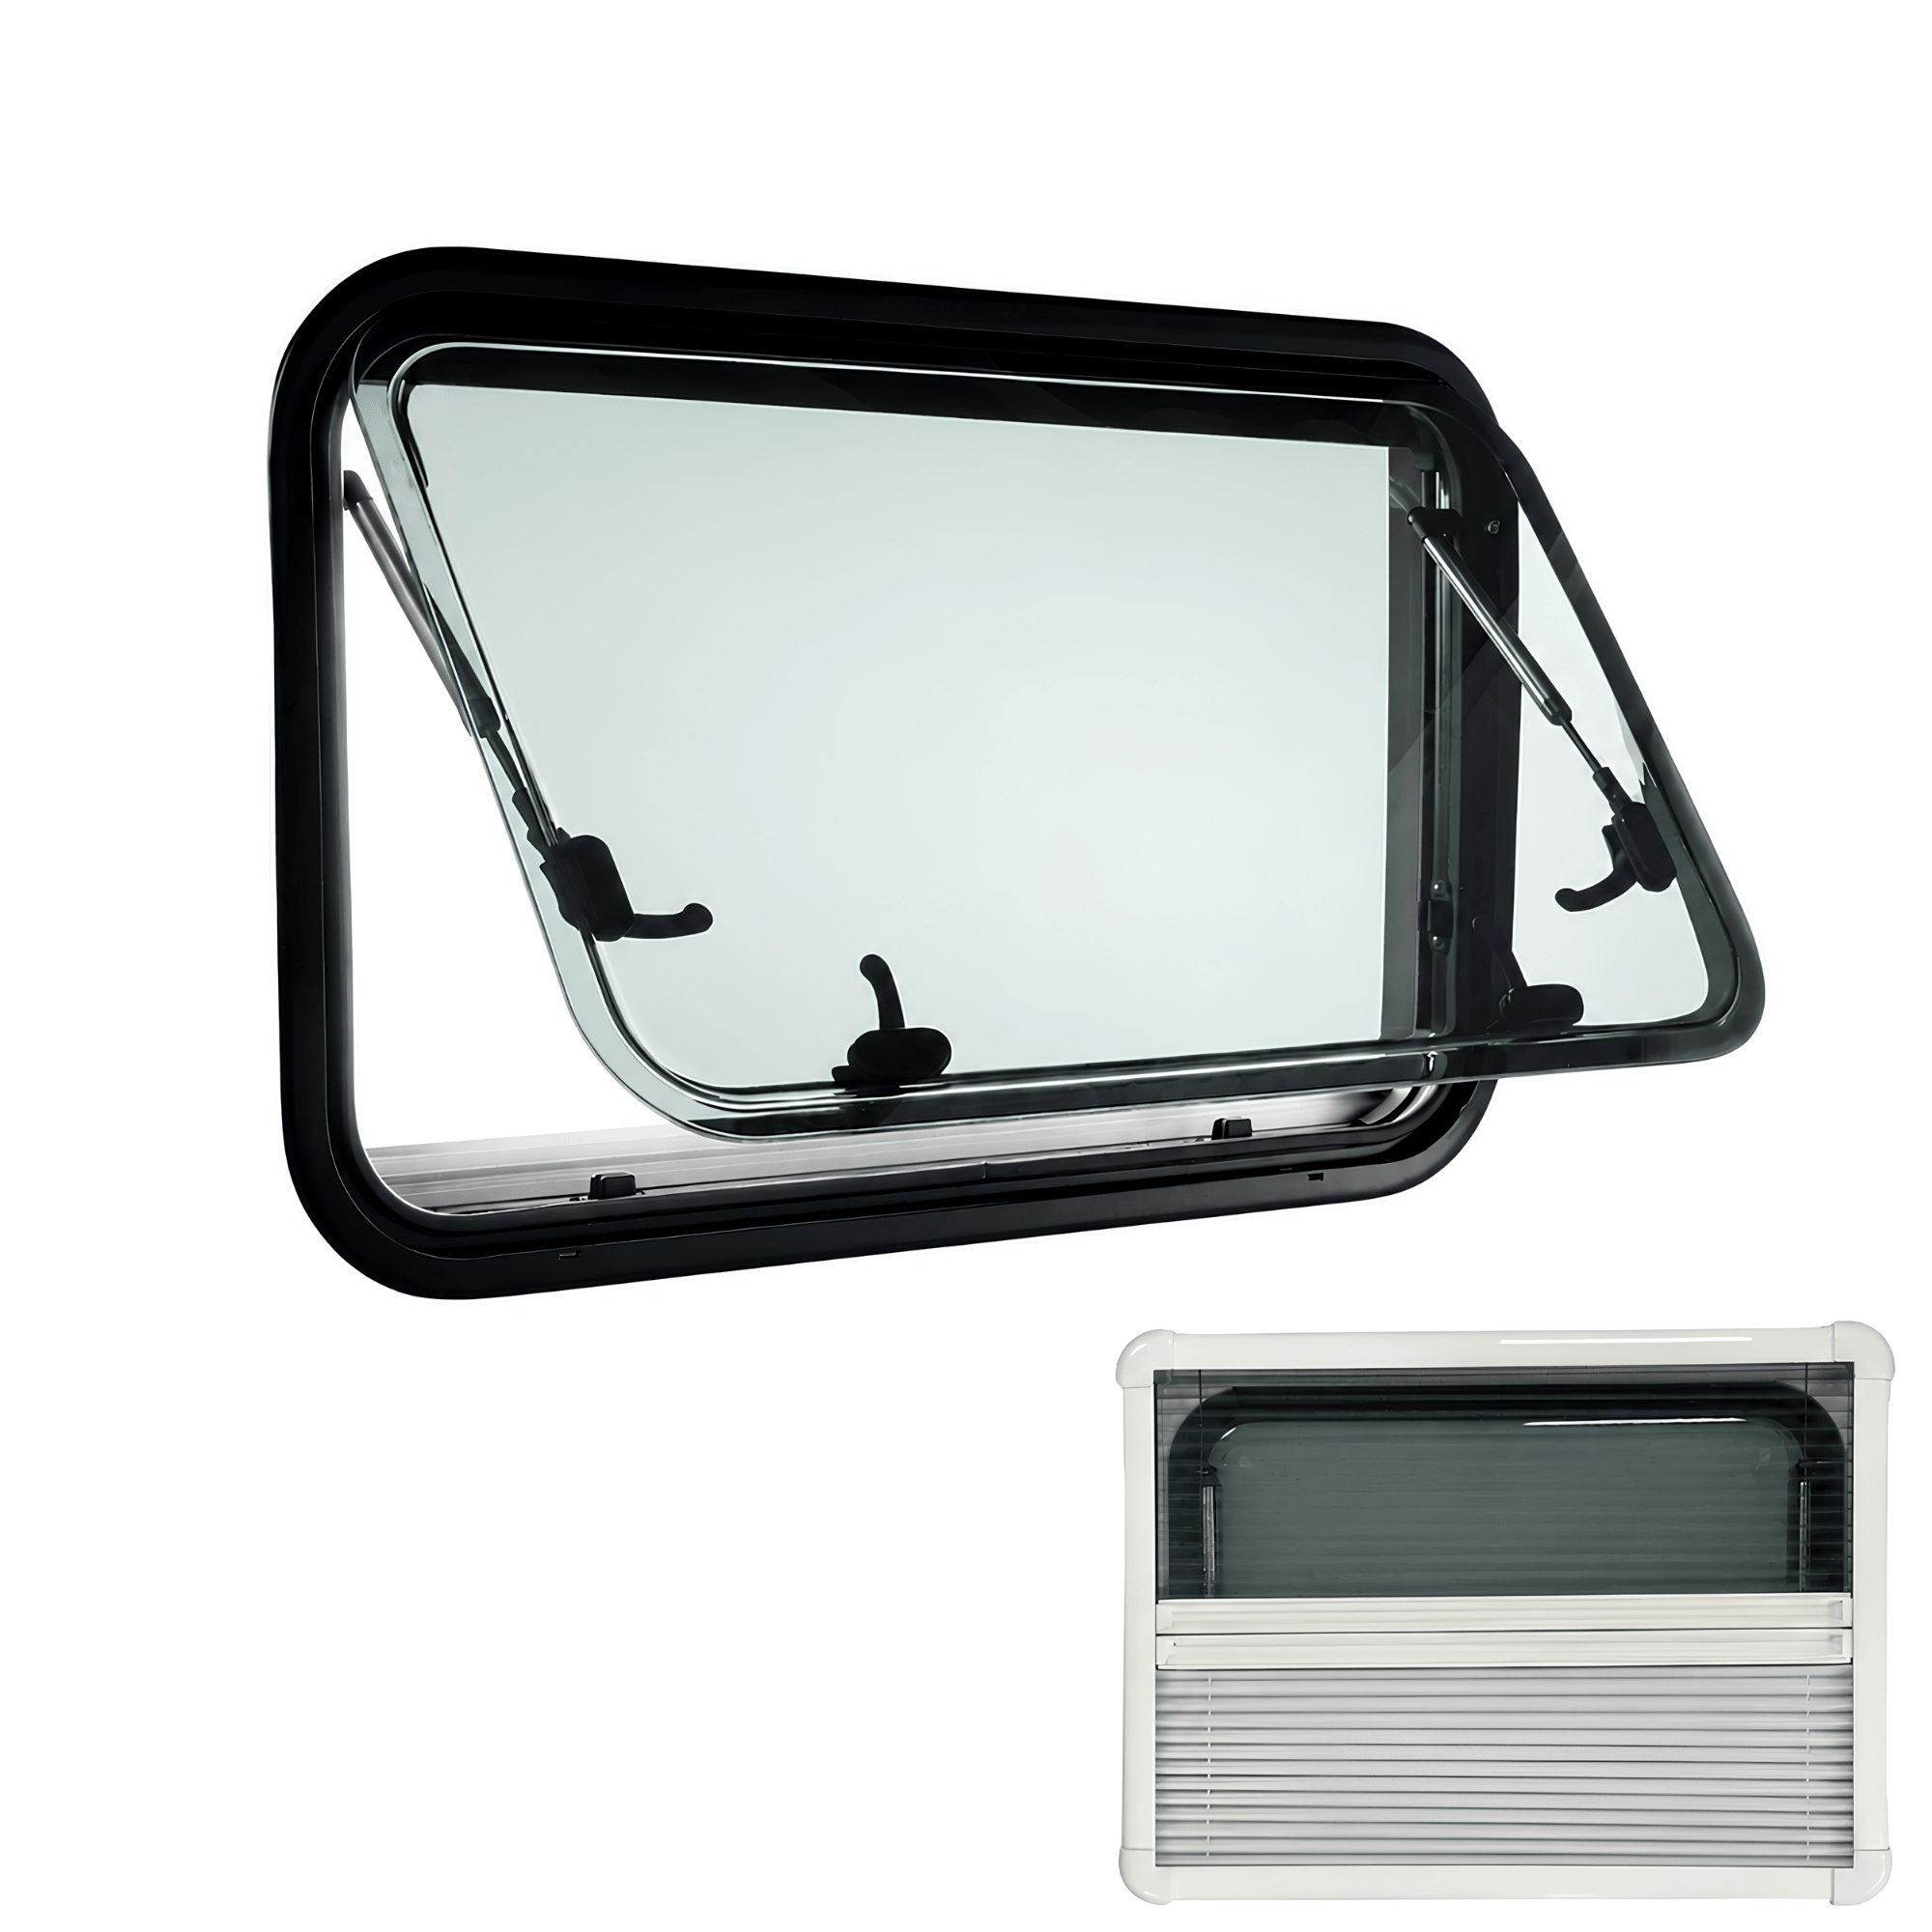
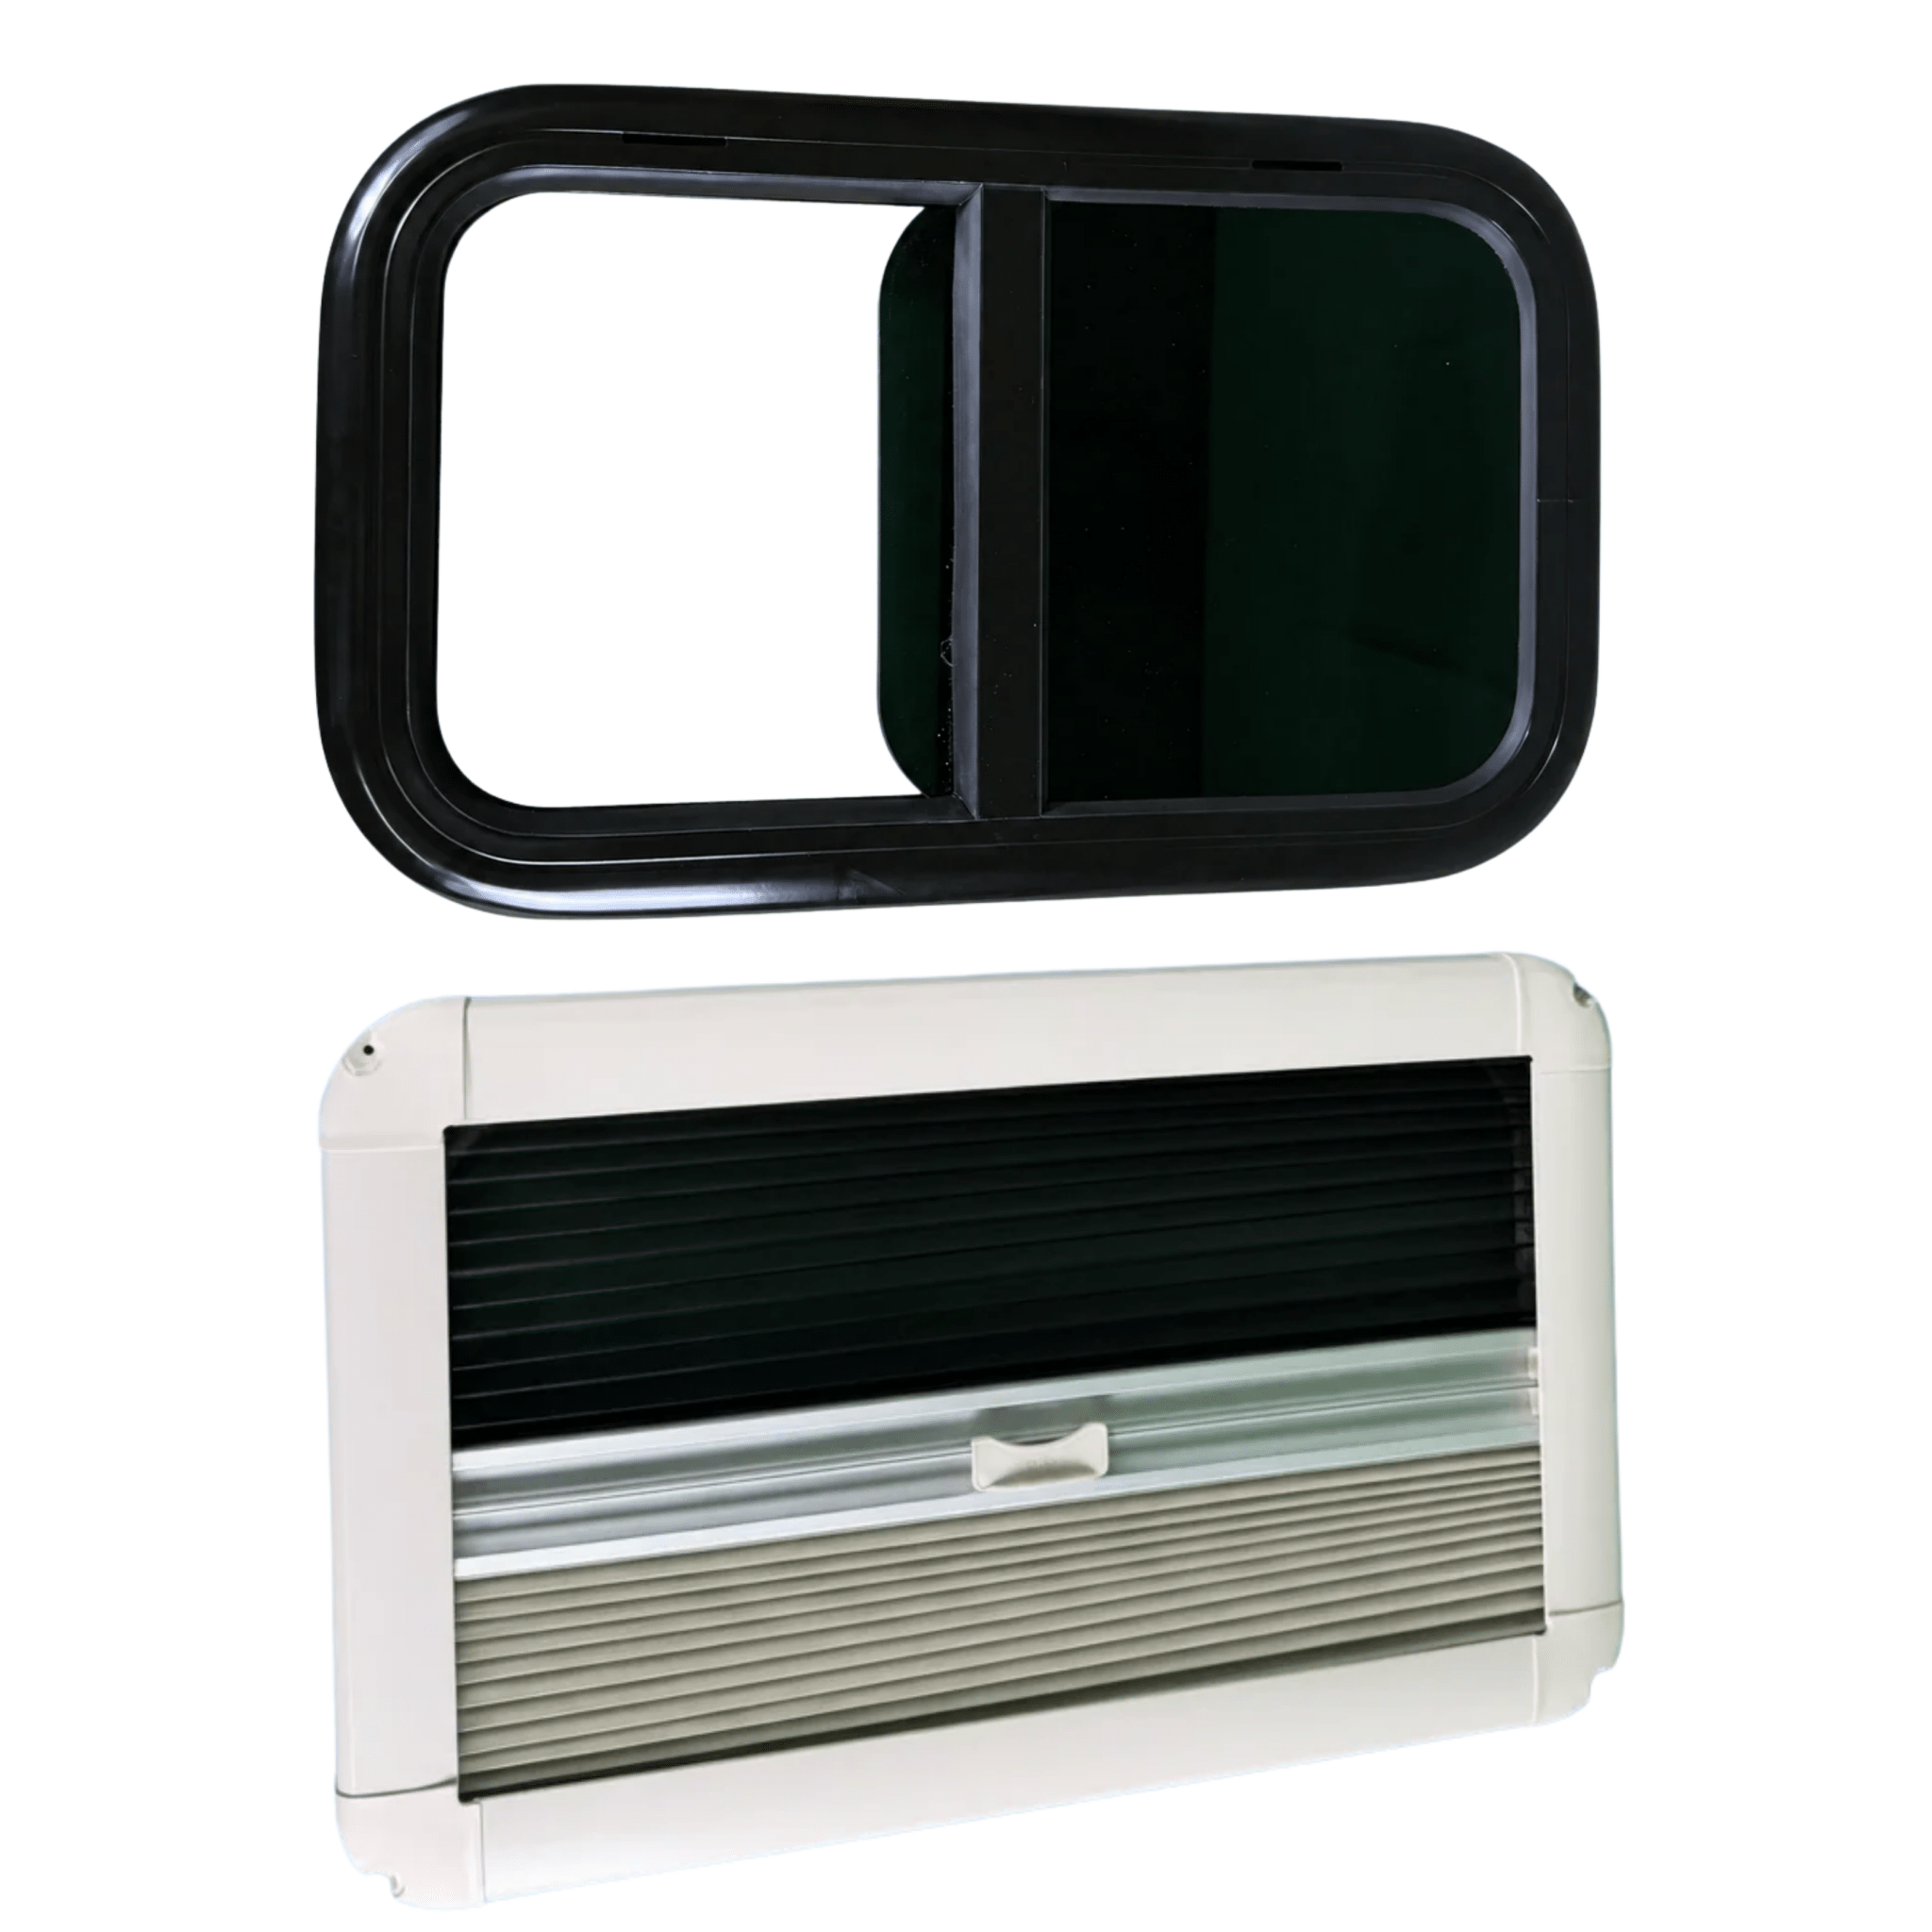
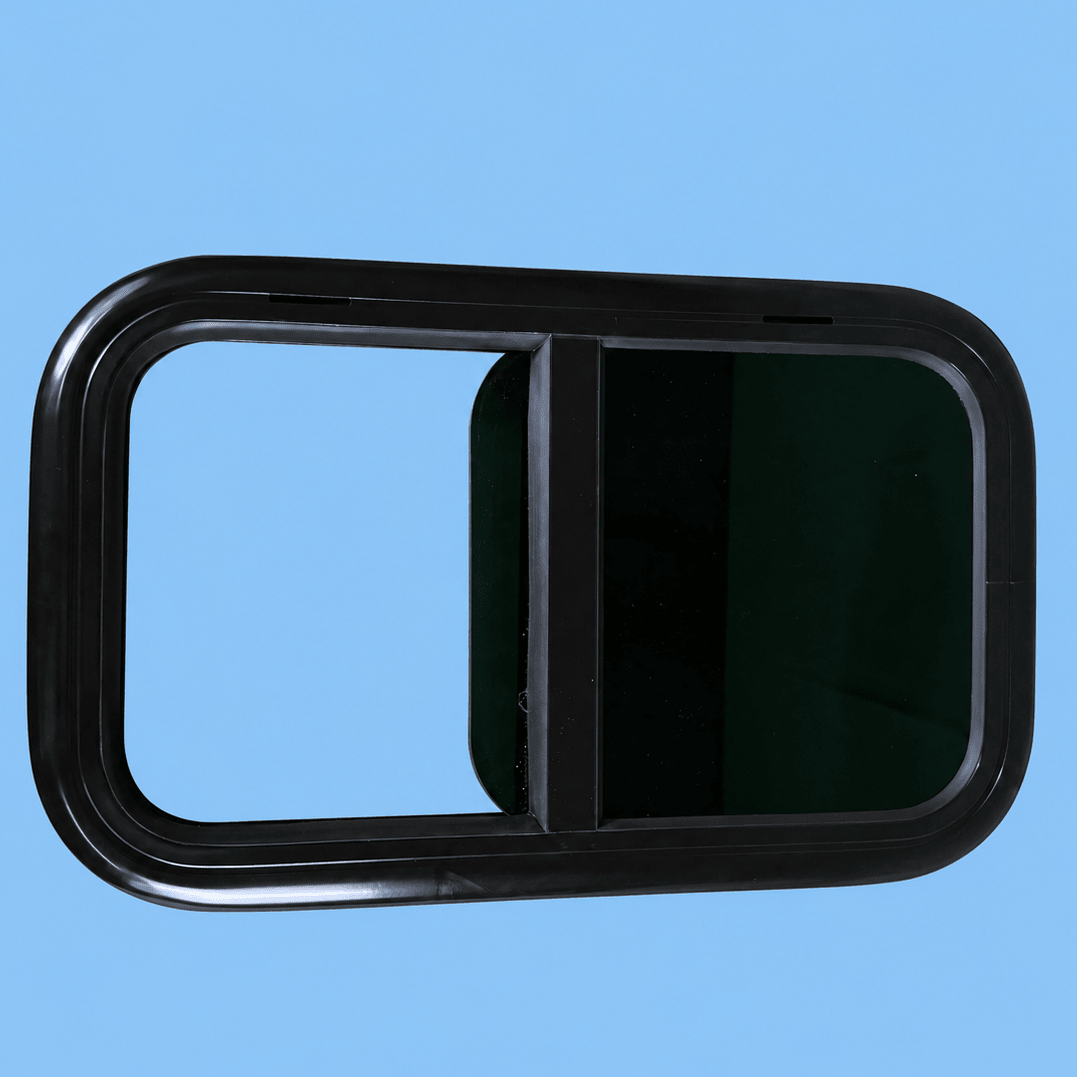
2. Step 2: Creating openings – Windows

Windows are a key element for comfort: natural light, ventilation, sense of space… but also exterior aesthetics.
1.1 Types of windows offered
At VANLIFE STORE, we offer several approved models, adapted to different uses.
Note: all our windows are compatible with panel van conversions (with curved walls)
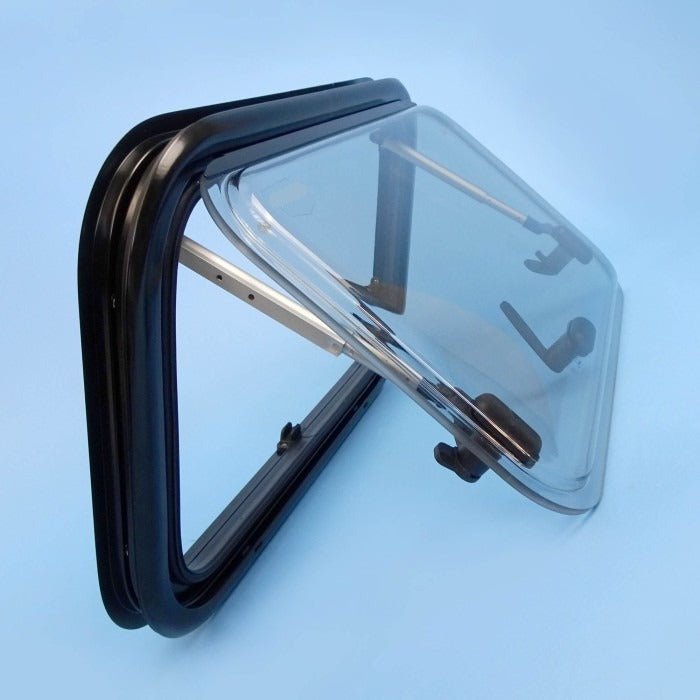
1.2 FOR PANEL VANS: CURVED OR FLAT WINDOW⁉️


There is no compatibility difference between the 5000 mm Curved Windows (Curved Window VANLIFE) and the non-curved windows such as SHADE, LIGHT, SQUARE (all visible in the Windows for Campervan).
The difference is that the curved windows perfectly fit the shape of the sheet metal but require making curved interior battens (which can be a challenge for beginners in carpentry).
Flat windows (types SHADE, LIGHT, SQUARE, SLIDE, etc.) mean that the vehicle's sheet metal adapts to the shape of the window. On a 50 cm high window installed on an L2H2 vehicle, there remains a 3 mm gap at the top and bottom between the window and the sheet metal, which corresponds exactly to the thickness of the sikaflex applied.
| Criteria | 🟢 Flat window | 🔵 Curved window |
| Compatible with curved walls | ✅ | ✅ |
| 📋 Approved ECE 43R (TUV / VASP / etc.) | ✅ | ✅ |
| Easy installation on panel vans | ✅ | ✅ |
| Battens / wooden frame required | Flat battens | Curved battens |
| Recommended products | SQUARE SHADE LIGHT |
CURVE |
At VANLIFE STORE, we offer several approved models, adapted to different uses.
Note: all our windows are compatible with panel van conversions (with curved walls)
1.3 Pop-out windows vs sliding windows
We often advise our customers to install pop-out windows because they are better suited to van life. This is why most series panel van conversions (Pössl, Adria, Hymer, etc.) have pop-out windows. Below is a comparison of the advantages
| Criteria | Push window | Sliding window |
| Can be opened in rainy weather | ✔️ | ❌ |
| Approved for certification (ECE 43R) | ✔️ | ✔️ |
| Can be opened while driving | ✔️ | ✔️ |
| Large window opening (brightness / panorama) | ✔️ | ❌ |
| Interior frame with window blind and mosquito net | ✔️ | ✔️ |
| Our star products | - SQUARE - SHADE - LIGHT - CURVE |
- SLIDE - SLIDE LIGHT - RW STYLE |
Pop-out windows are the most suitable for vanlife (can be opened even in the rain, larger opening).
Sliding windows are useful in certain specific cases. For example: to install on a panel van on the panel covered by the sliding door → prefer a sliding window to avoid damaging a pop-out window when you open the door.

👉 Key takeaway:
- Pop-out windows are best suited for vanlife
- The Vanlife Store models have a semi-open position allowing air intake even while driving
- Sliding windows are only useful when installing a pop-out window is not possible
1.4 Window range comparison
| Criteria | SHADE | SQUARE | LIGHT | SLIDE LIGHT | SLIDE |
| Type of window | Pop-out | Pop-out | Pop-out | Sliding | Sliding |
| Compatible with Motorhome | ✔️ | ✔️ | ✔️ | ✔️ | ✔️ |
| Compatible with Campervan | ✔️ | ✔️ | ✔️ | ✔️ | ✔️ |
| ECE 43R | ✔️ | ✔️ | ✔️ | ✔️ | ✔️ |
| With full frame with window blind & fly screen | ✔️ | ✔️ | ✔️ | ✔️ | ✔️ |
| Type of glazing | Double acrylic | Double acrylic | Double acrylic | Double acrylic | Single acrylic |
| Glazing tint | Dark (30%) | Dark (30%) | Clear (70%) |
Clear (70%) |
Dark (30%) |
| Window corners | Rounded | Square | Rounded | Rounded | Rounded |
| Outer glazing | Flat | Flat | Curved | Curved | Flat |
1.5 Our star windows


👉 All our windows are approved and suitable for converted vehicles.
👉See our full collection of windows for van and motorhome
✅ Free delivery from €399 | Returns within 30 days | CE / VASP approved
3. Step 3: Creating openings – Rooflights

Rooflights are essential for ventilation and brightness.
Why install them?
- Renew indoor air
- Evacuate humidity (kitchen, shower) and prevent mold!
- Bring natural light
- Improve thermal comfort
Available types
- Classic rooflights → simple ventilation
- With fan → active air extraction
- Panoramic → maximum light and visual opening
💡 A good rooflight completely changes the comfort of life inside the vehicle.
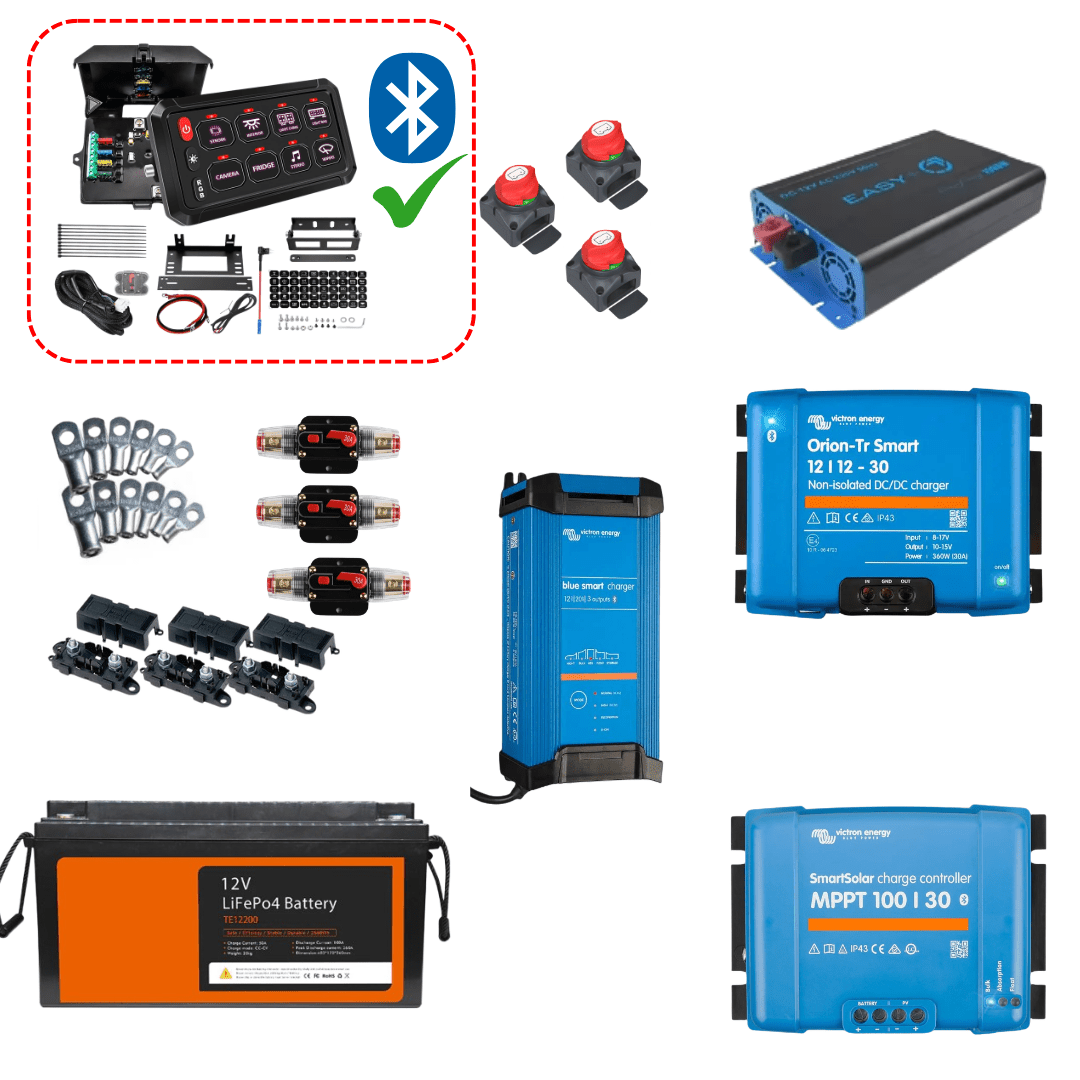
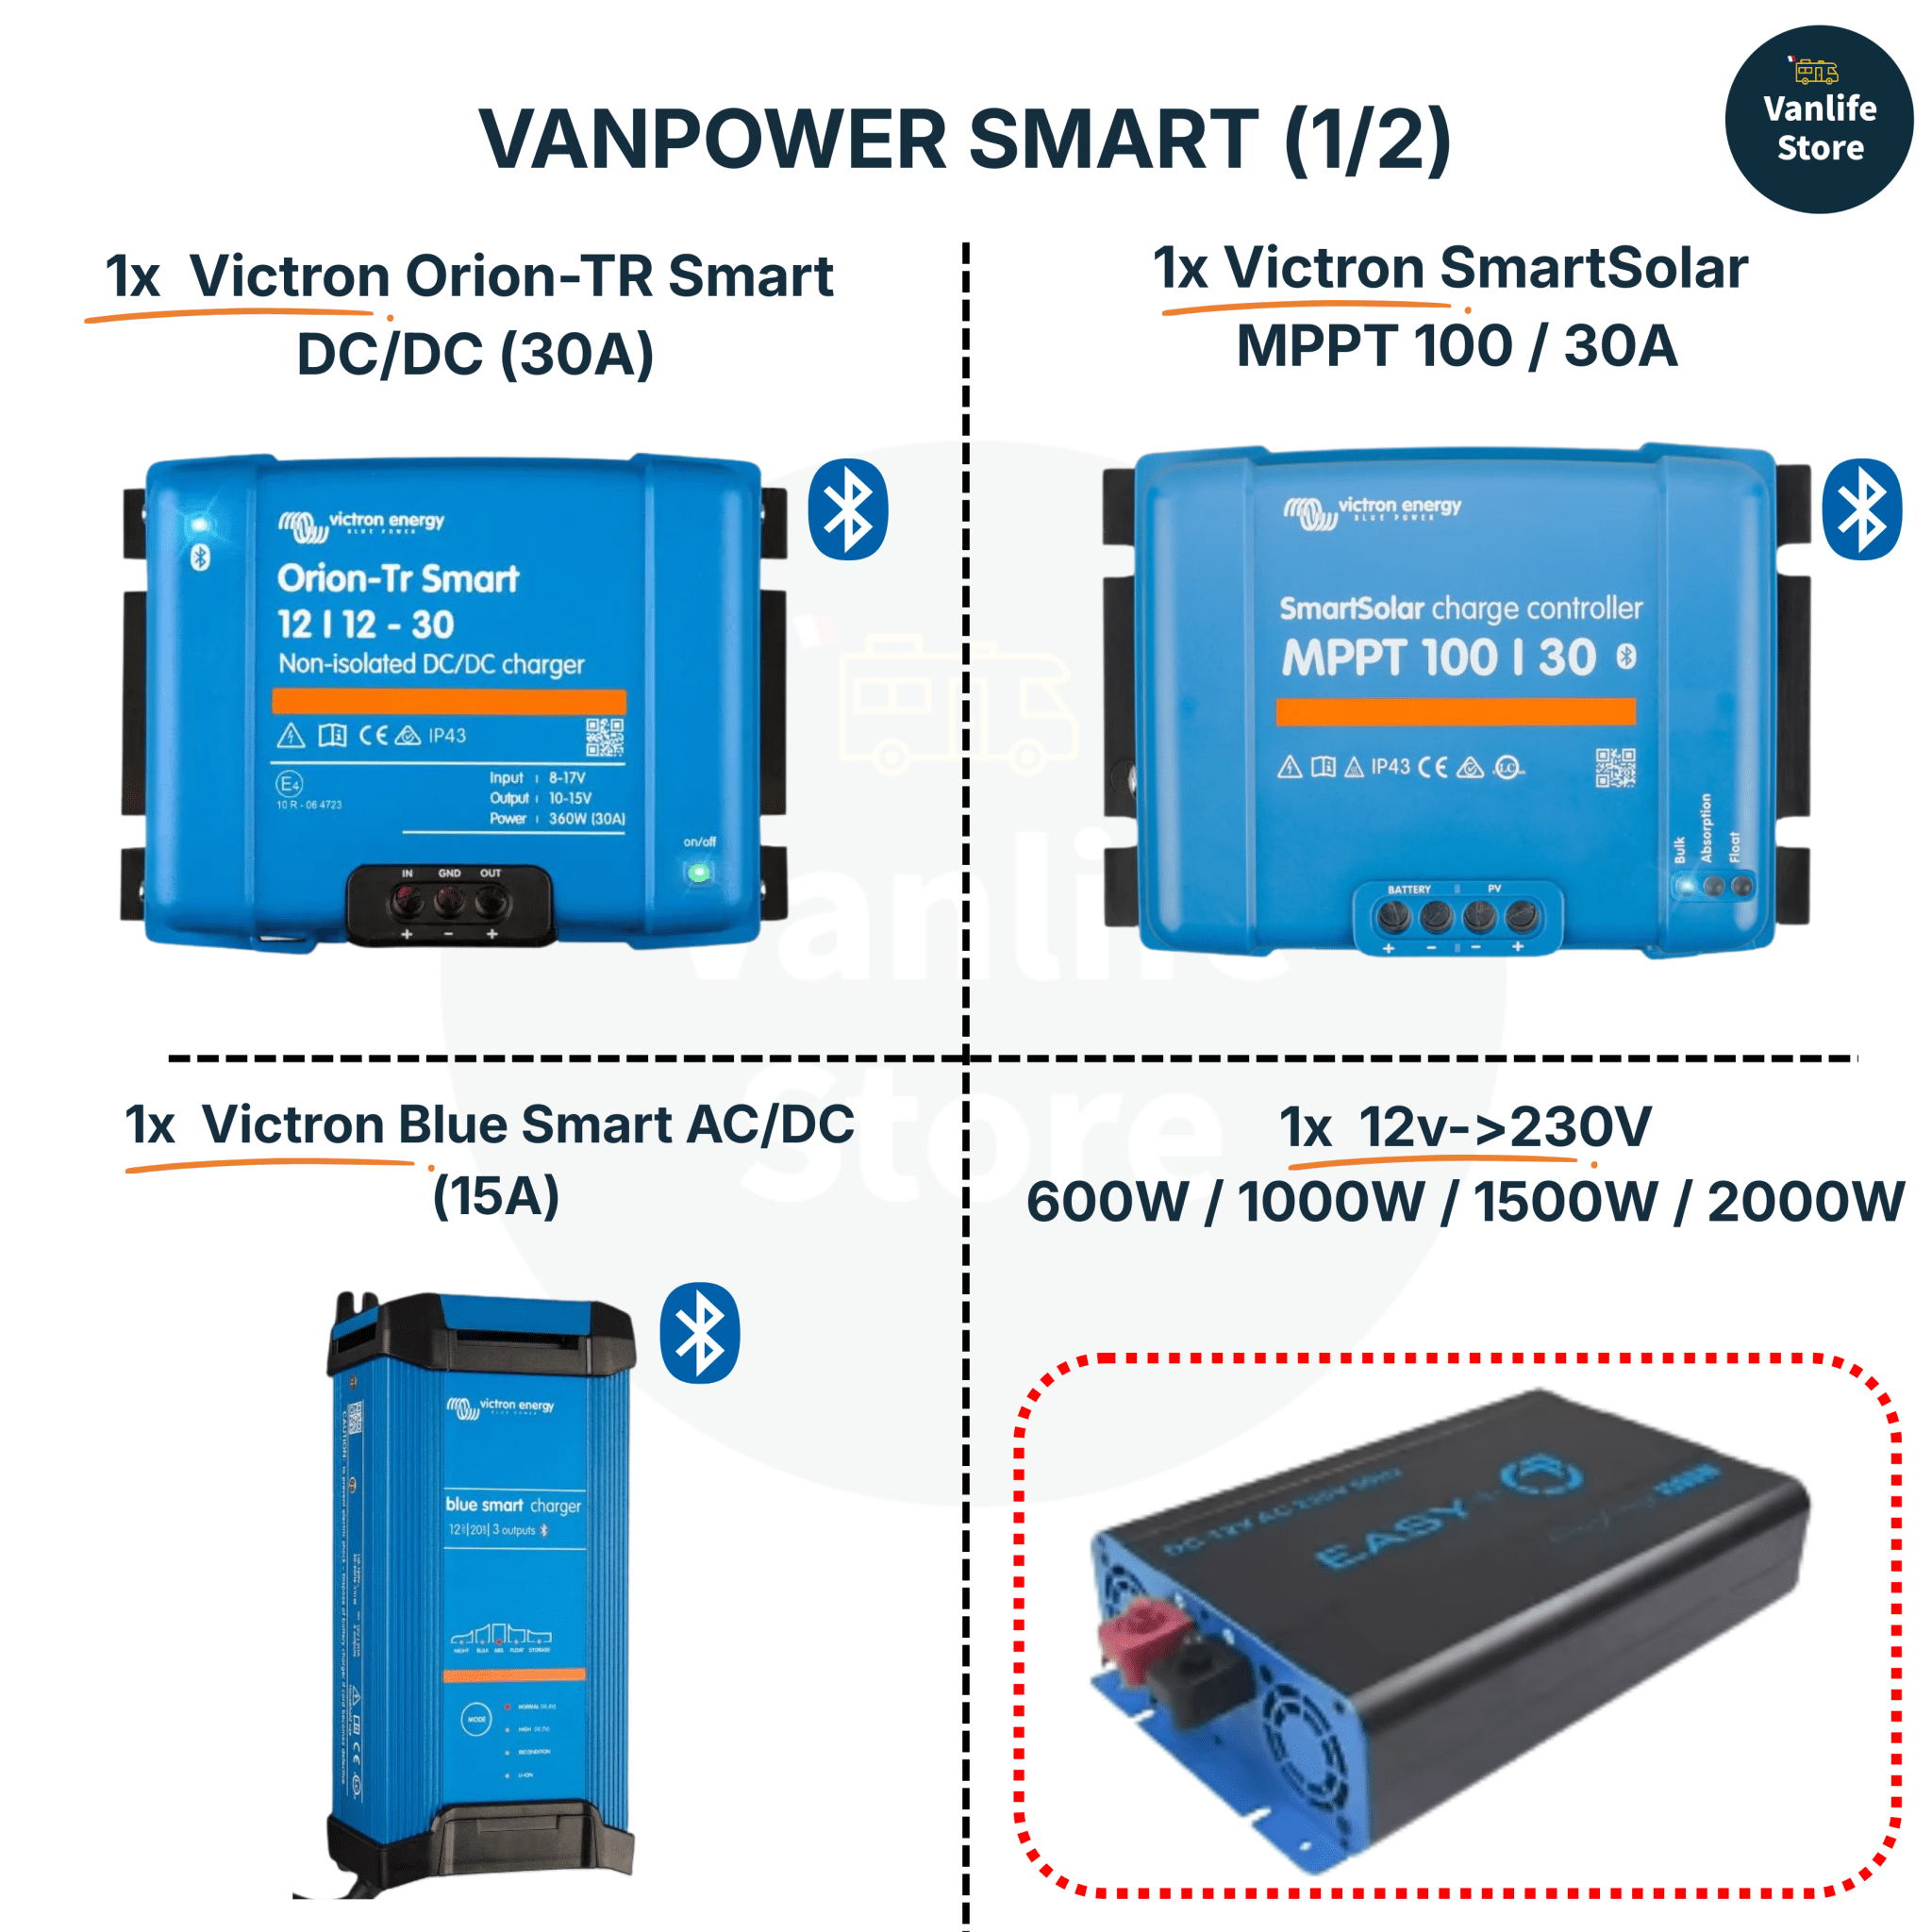
4. Step 4: Pre-wiring and electrical installation

Electricity is the heart of your autonomy.
👉 Good news: we offer complete electrical kits (all-in-one).
Note
- Solar panels are not included in our kits (fragile during transport)
- But our kits are compatible with all home solar panels (400w-500w) sold in DIY stores (Leroy Merlin in France, and similar in other European countries)
- But our kits are compatible with all home solar panels (400w-500w) sold in DIY stores (Leroy Merlin in France, and similar in other European countries)
Kit comparison
Two important questions to ask before choosing an electrical kit:
- Do I need 230V (coffee maker, microwave, accessories that do not work on 12V)
- This significantly changes the final bill because an inverter represents one of the largest budget items
- How long do I need to be autonomous
- This affects the choice of battery capacity (amount of stored energy) which ultimately impacts the pack price
| Options | Advantages | Uses | Vanlife kits |
| Without inverter | Simple installation, cheaper | 12V devices only | - VANPOWER 12 - VANPOWER SMART 12 |
| With inverter | Allows use of 230V | Microwave, PC, coffee maker |
- VANPOWER 12-230 - VANPOWER SMART 12-230 |
SMART switch box vs classic


Vanlife Store offers in its optional packs the SMART 12V distribution and switch box. Originally from the tuning world, it is a real asset during conversions as it provides two essential points:
- Reduces the amount of electrical wiring used
- Unlike the simple box where wires must pass through the switch point before reaching the 12V distribution box, the smart box allows all 12V accessories to go directly to the distribution box, then a single cable (provided) connects the distribution box to the switch box
- Allows control of accessories via Bluetooth
- The switch box can be controlled manually or via Bluetooth (by phone) => a real advantage during holidays
| Options | Operation | Advantages |
| Classic box | Manual switches | Simple, reliable |
| Smart box | Bluetooth control | Control via smartphone |
Our electrical kits


Our kits are compatible with commercial solar panels (Leroy Merlin, Castorama, etc.). Solar panels are not included to avoid damage during transport.
5. Step 5: Insulation

Insulation is done after the electrical cables are installed.
👉 Objectives:
- Retain heat in winter
- Keep cool in summer
- Reduce condensation
- Improve acoustic comfort
Recommended solution
- Armaflex: the reference in insulation for vans
See our full ARMAFLE range ARMAFLEX Insulations for van and panel van conversions
Our bestseller: the Armaflex AF 25mm self-adhesive, the reference for professional and amateur converters.


insulations for Campervan
Once the structure is ready, it's time for comfort!
✅ Easy to install, durable, and very efficient.
6. Step 6: Heating: stay warm all year round
Heating is often underestimated by beginners, but it is one of the pieces of equipment that most radically changes the comfort of life in a van. Whether you travel in the mountains, in winter, or simply in the shoulder seasons, a good heating system allows you to enjoy your vehicle all year round.
Why install a heater?
- Travel comfortably in all seasons, even in winter
- Eliminate moisture and condensation inside the vehicle
- Protect your equipment from freezing (pipes, battery)
- Enjoy your van 12 months a year, not just in summer
Types of heaters
| Criteria | Diesel heater (air) | Diesel heater (water) | Electric heater |
| Fuel | Diesel (vehicle tank) | Diesel (vehicle tank) | Electricity (battery) |
| Installation | Moderate | Complex | Simple |
| Heats sanitary water | No | Yes | No |
| Consumption | 0.1 to 0.25 L/h | 0.15 to 0.35 L/h | High (drains battery quickly) |
| Autonomy | Excellent | Very good | Limited |
| Recommended use | Main heater | Heater + hot water | Supplement only |
💡 The air diesel heater is the most popular solution among converters: economical, autonomous, and effective even in severe cold.
Our diesel heaters


Hot water: added comfort
Having hot water in your van is a new level of comfort. Whether for washing dishes, washing hands in cold weather, or taking a real shower, a water heater completely changes the vanlife experience.
Our water heaters


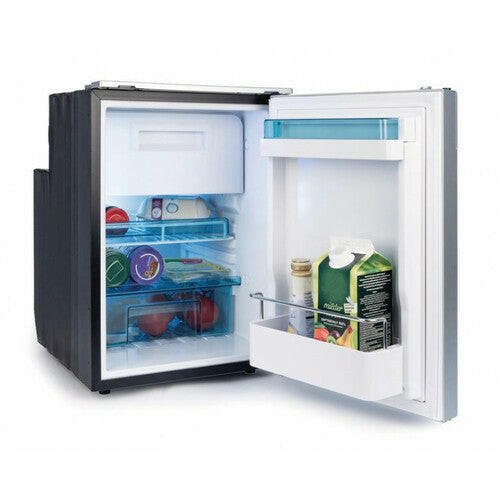
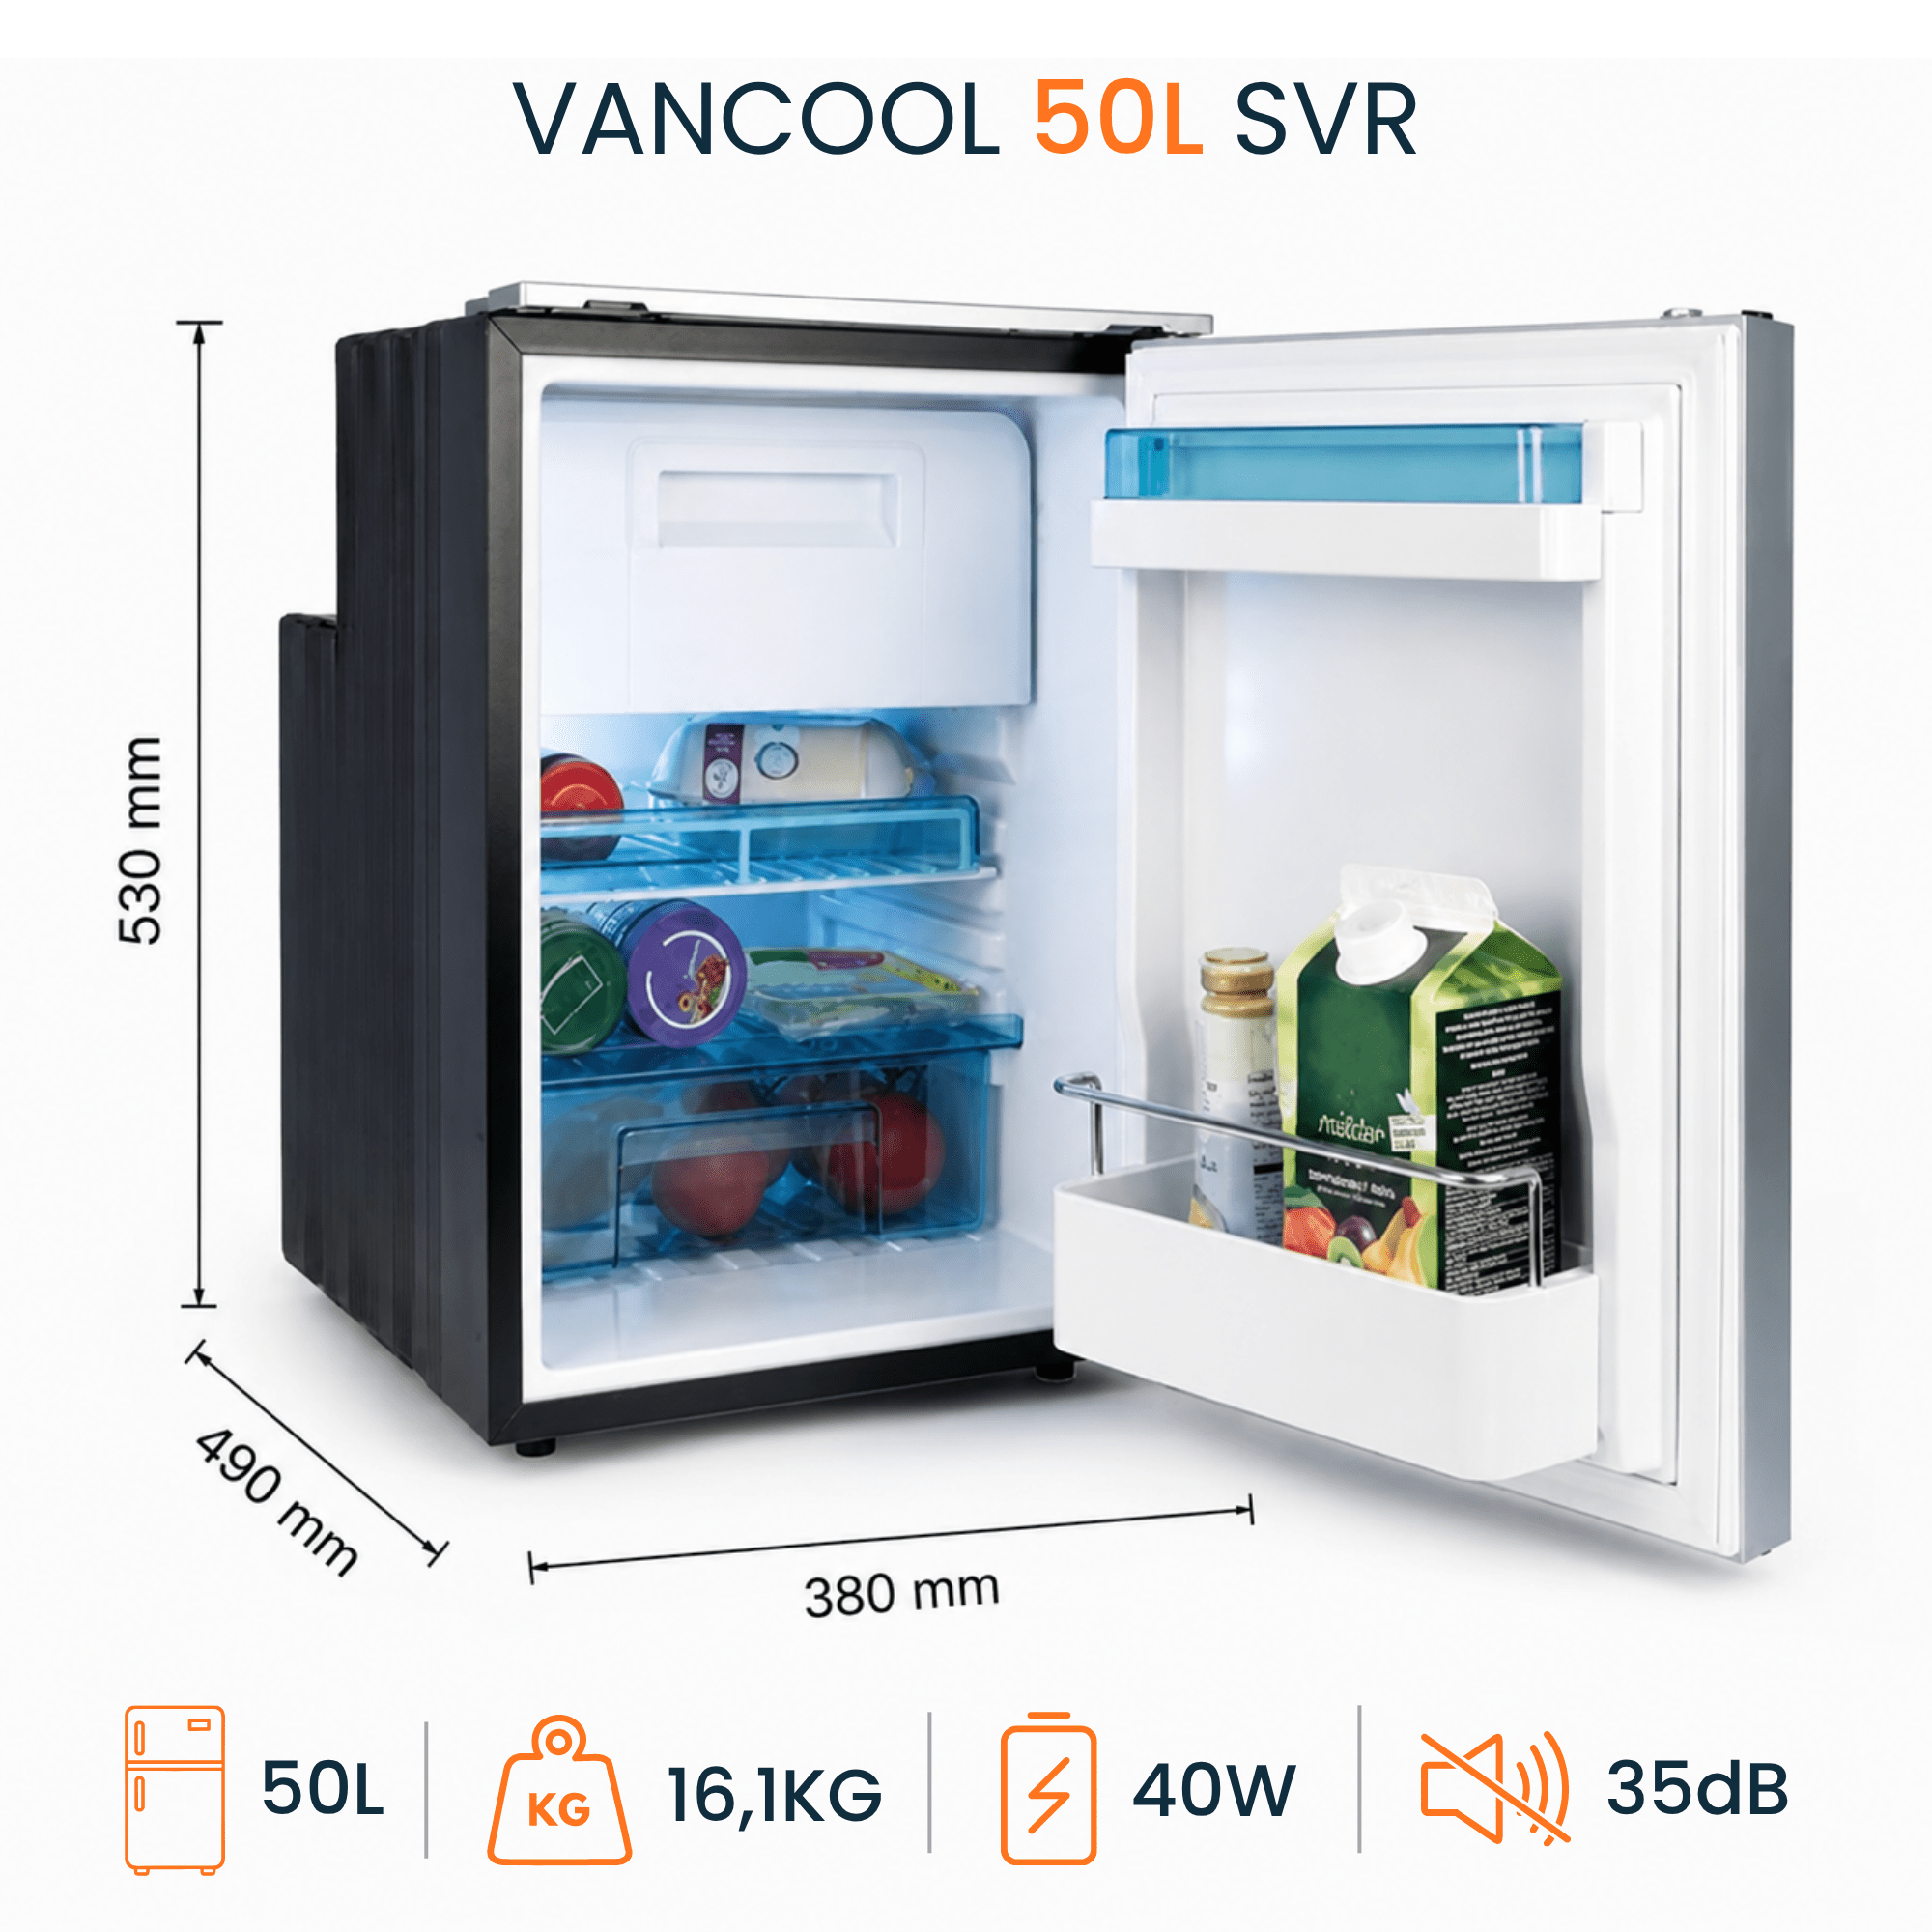
7. Step 7: The kitchen: fridges, pump and sink at the heart of your van

The kitchen: your daily autonomy
In a van, the kitchen lets you live freely: cook, wash, or enjoy a coffee wherever you are.
What we offer
Sinks for vans: compact and practical, with or without integrated stove to optimize space.


of sinks for Campervans
12V Water pumps: reliable, quiet and easy to install to supply your sink.


of water pumps for Campervans
Fridges for vans: keep your food fresh, even off-grid.
Our 12V fridges are compatible with simple 12V battery connection or 230V connection with a cigarette lighter adapter.
The connection is very simple and can even be done with a switch-selector to avoid having to reconnect when switching from a 12V source to a 230V source


Discover our selection of 12V fridges for Campervans and Motorhomes


8. Step 8: Installing the toilets & bathroom
Depending on your use (weekend or full-time), several options exist.
🚽 Types of toilets
| Type | Use | Advantages |
| Portable toilets | Occasional use | Simple, economical, portable |
| Cassette toilets | Regular use | More comfortable, external emptying, 12V connection, |
💡 Cassette toilets are ideal for long trips.


Conclusion: the list of elements to outfit your van step by step
From vehicle preparation to the final touches, Vanlife-Store supports you at every step with tested, approved products adapted to the specifics of vanlife.
What you can equip with us:
✅ Pop-out and sliding windows CE/VASP approved and compatible with all types of Campervans
- ✅ Skylights with or without fan
- ✅ Complete electrical kits (classic or smart Bluetooth box) with installation diagrams
- ✅ Self-adhesive Armaflex insulation
- ✅ Heaters and water heaters for van
- ✅ Very wide choice of 12V compressor fridges compatible with 24V or 230V connection
- ✅ Sinks, water pumps, kitchen equipment
- ✅ Portable toilets and cassettes
In addition to accessories at the best prices VANLIFE STORE is committed to your projects:
🚛 Free delivery from €399 / £399 / 399 CHF
💬 Free technical advice by chat or phone (Mon-Fri 10am-5pm)
🔄 Returns and exchanges within 30 days
💳 Payment in 4 installments without fees with Klarna
🎁 Up to 15% extra discount on your cart
👉 View all our conversion accessories
---
Is it necessary to approve your Campervan?
Yes, if you convert a utility vehicle into a leisure vehicle (VASP), an individual approval (RTI) is required. All our windows are 43R approved to facilitate this process.
Which step to start your conversion with?
The recommended order is: sanitation → openings → electrical pre-wiring → insulation → carpentry → equipment (kitchen, sanitary). Follow the steps in this guide!
Which battery to choose for a Campervan?
For seasonal use, a 100Ah AGM battery is sufficient. For intensive or full-time use, choose a lithium LiFePO4 battery: it lasts longer, charges faster, and supports deep discharges.
Do you have other questions?
Our team answers for free by chat or at +33.1.89.48.06.01 (Mon-Fri 10am-5pm).